
If you’re brand new to this craft than you may be feeling a little overwhelmed with all the supplies you need to create stained glass. Some with reasonable price tags, and others that can get quite expensive. Truth is, stained glass (or any glass medium for that matter) is not a cheap art to get into. However, knowing what supplies you absolutely need and what you don’t can save you a lot of money.
In this post I’m going to break down the essentials from the not-so-essential.
In each section I will link out to the stained glass supplies I personally recommend. I will continue to update this article with any superior products I find.
*Heads up: TGC is reader-supported and this page may include affiliate links. If you click and purchase, I may receive a small commission at no extra cost to you. As an Amazon Affiliate I earn from qualifying purchases. You can read my full disclosure here.
To make your shopping journey a little easier I’ve created two supplies checklists. This is a single download that comes with a supplies list for creating stained glass using only copper foil, as well as one for creating copper foil stained glass framed with lead came.

Necessary Stained Glass Supplies You Absolutely Need
1. Basic Safety Equipment
Before we get into the fun stuff, we need to cover the basic safety equipment you’ll need. Creating stained glass art involves, obviously – glass, LEAD, and a handful of heavy chemicals. At every step in the process, there is a need to protect yourself. So let’s go over the essentials for this.

Gloves
Now, if you’re like me you hate gloves. I am NOTORIOUS for not using gloves in situations where most people would. I have tiny hands and it’s so hard to find gloves that fit correctly and allow my hands to operate the way they should. But you best believe (after many cuts, burns, and chewed up fingers) I use gloves when working with stained glass!
There’s two types of gloves you’ll want to have handy. Cut resistant protection gloves to protect your hands when handling sharp edge glass, and grinding. And disposable gloves to use when working with flux and patina, both of which will cause irritation to your skin.
Safety Glasses
Please believe me when I say: If you do not wear the appropriate safety glasses you WILL get glass in your eyes! This is painful and unnecessary.
I’ve even had to go to the doctor once from a scratch on my eyeball. That was hands down one of the worst weeks ever until it healed. You also DO NOT want to get fumes or hot solder in your sensitive eyes. Don’t be silly, protect yourself.
Mask or vent
When soldering you have to use a chemical called flux. When flux is burned it lets off fumes. This fume is very bad for you.
If you’re able to solder in a well ventilated area, that’s great! However, I know it isn’t always possible. There are different fume extractors you can purchase to set at your workspace while you solder. These are great options if you don’t want to work with a mask over your face.
If you do prefer a mask you’ll need one that can properly protect you. Remember, when you’re soldering your face is directly over the fumes. Just keep that in mind. You will need something like this mask that protects against chemical fumes.
Lead off Soap
If you’re careful, working with big bad lead isn’t an issue. It only because a problem when it is ingested. This is where something like D Lead soap is great so you can be sure to remove all the lead before you make contact with your face or mouth, or your food.
2. Glass Sheets
Now onto the fun stuff…

Starting with the most obvious here, you will need glass sheets to create stained glass art. If you have a local stained glass studio or supply store, I would highly recommend visiting there to buy your glass.
There are some great online sources for sheet glass. however, and especially when you’re first starting out, there’s nothing like picking up the glass, seeing the vibrancy of the colors, and feeling the texture. It’s a far better way to shop for glass whether you’re a beginner or seasoned artist.
Standard glass sheets come in 12×12, 8×10, or you can cut from larger pieces of glass if you need something bigger. There are also a lot of great glass pack options so you can get a multitude of colors without spending so much money. Some glass studios will even have a scrap bin with highly discounted glass pieces.
If you’ve never seen sheet glass before and you don’t live close to a glass studio, I cover a lot of the types of sheet glass you can find in detail here.
3. Stained Glass Pattern
There are a ton of free pattern options online, as well as some free and paid patterns here on TGC. You can also draw your own pattern.
4. Scissors
There are special scissors specifically for stained glass patterns. These scissors are designed to remove a small strip of paper so that your pattern pieces are the appropriate size considering the lead came that will be used between the pieces. If you’re working with foil tape for the middle seams of your piece, these are not necessary.
When working with copper foil tape you’ll still need scissors, but these can be any average pair of scissors you probably already have around the house.
6. Sharpie Markers
There’s a few different ways to transfer your pattern onto your glass. The more you create, the quicker you’ll find your preferred method. Either method you choose, however, at some point a Sharpie permanent marker will always come in handy so have plenty!
Pro tip: If you ever have issues with your permanent marker coming off during grinding, you can protect your lines with Chapstick or Vaseline.
7. Glass Cutter
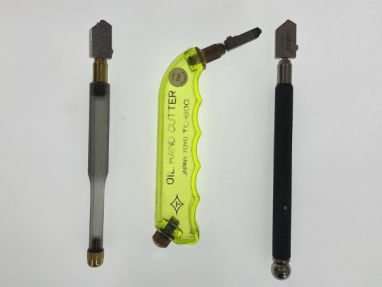
The glass cutter is pretty basic and straightforward. This tool is what you will use to score your glass sheets so that you can break them into the smaller pieces to use for your project. There are three main types of glass cutters:
Pistol grip cutter – Personally, this is what I prefer to use. The pistol grip cutter is held like a box cutter and stores the cutting oil inside so you don’t have to constantly refill it. I’ve heard some say that this glass cutter is prone to leaking, but in over a year of using mine I’ve yet to have that issue.
Pencil shape cutter – Just as the name implies, this glass cutter is shaped and held like a pencil. Like the grip cutter, it too holds the cutting oil in the tube.
Dry Wheel Glass Cutter – If you don’t feel like messing around with cutting oil, there’s also the dry wheel glass cutter. These are shaped and held like the pencil shape cutters. NOTE: I included the link here so you can see more about this product, however I’ve never used one of these.
8. Glass Cutting Oil
If you do get one of the glass cutters that require oil, you will need some glass cutting oil. If you look closely at your glass cutter you will see that it’s a tiny little wheel. This oil helps keep that wheel lubed up and working properly. The oil also prolongs the life of your glass cutter.

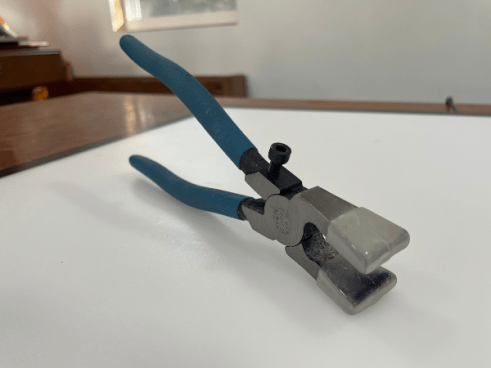
9. Running Pliers
The running pliers are necessary for cutting your glass, and are pretty straight forward. This tool has a line down the middle to line up with your score. They quite literally “run” the score through the glass creating a clean break.
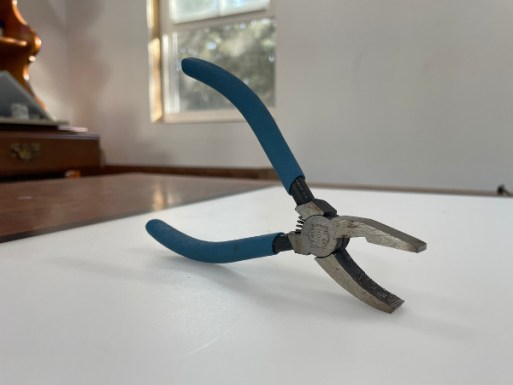
10. Grozing Pliers
You will need grozing pliers to pull smaller bits of glass away from your score line. You can either hold the glass firmly and pull straight out, or literally groze and chip away little pieces of glass until you have your desired shape.
This tool takes a little practice, but is necessary for cleaning up pieces with smaller bits of glass without doubling your time on the grinder. And trust me – you do not want to spend any extra time on the grinder!
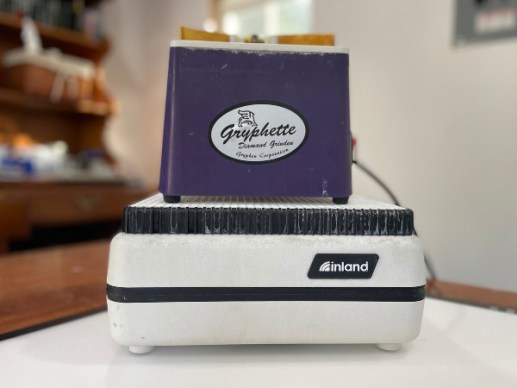
11. Glass Grinder
To get the flat, smooth edges you need to create a flawless stained glass piece, you’ll need some sort of grinder or file.
I’ve never used an abrasive stone myself, but I’ve seen other people use them and they’re a far less expensive option if you’re not ready to purchase an electric grinder.
If you’re ready to drop some cash the Inland Stained Glass Grinder is definitely my personal favorite!
12. Copper Foil Tape or Lead Came
Since you’re learning on your own, you’ll most likely be working with foil tape to start. It’s cheaper than lead came, and easier to use for smaller hobby pieces until you master your basic skills and graduate to incorporating lead came.
However, maybe you’re a fast-paced learner and quick to pick it all up. After all, using lead came around the border of a piece will make it look SO much better than just tinning & beading your edges. For that reason, I’m including both.
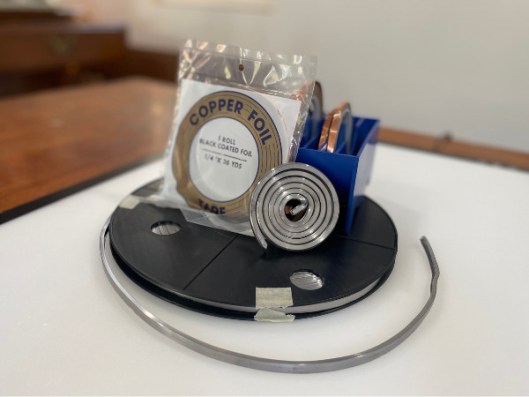
Copper Foil Tape
Foil tape comes in all sizes and backing colors.
You should match your backing color with the color you intend to make your solder lines. So if your plan is to keep the silver of your solder, get silver backed tape. If you wish to patina your solder black, get black backed copper foil tape.
The thickness of your foil tape will determine how thick your solder lines are. Keeping in mind that your typical glass sheet is 3mm thick, you can get as small as 3 mm in copper foil tape, or as large as 13 mm thick. When just starting out 7/32” or ¼” is the best.
For more information on sizing, color and brands, visit my Guide to Stained Glass Copper Foiling.
Lead Came
If you opt to use lead came vs copper foil, you’ll need both the U and H shaped lead came. The U Shaped lead came will be used for the border of your piece, while the H shaped came is used to connect your design pieces together. If you are using the tiffany method (aka copper foil method) but want to border your piece in lead came, all you will need is the U Shaped Lead came.
I prefer to purchase my lead came online. I’ve purchased a piece from my local glass studio once before, but it ended up getting all messed up since it came in a long strip. When I purchase it online it comes coiled up which is much easier to store.
13. X-Acto Knife (only when using copper foil)
When you’re applying your copper foil tape, you won’t always get it right. Especially in the beginning. So having an X-Acto knife handy will allow you to cut away overlapping pieces. It’s also great for when you get a tear in your copper foil. You can lay another piece of foil over, and cut down to the shape it should be.
14. Soldering Iron + Stand
Of course you’ll need a good soldering iron to solder your glass pieces together. If you think you’re in it for the long haul, your soldering iron isn’t something to cheap out on. There’s only one soldering iron that I recommend and that’s the Hakko FX-601. With this soldering iron you can easily change your temperature without having to use a separate calibration station. Different temperature settings are great for tinning your edges when you’re first starting out!

Unless the soldering iron comes with a stand already, you’ll want to invest in one. Soldering irons get VERY hot, so you’ll need a safe place to set it between soldering. You’ll notice on these stands there’s also a place for a wet sponge. This will be used to clean your soldering iron while you solder. In my experience, this makes a huge difference in the outcome of your solder lines.
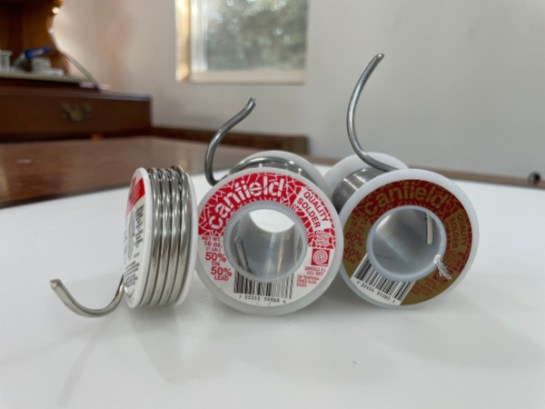
15. Solder
You’ll notice when shopping for solder, there’s a few different kinds. 60/40 solder is what you will need 90% of the time unless you prefer to use lead free solder. There’s also 50/50 solder, which is good for filling large gaps. However, I personally never use my 50/50 solder.
Lead free solder is essential when creating pieces such as jewelry or anything that will be in constant contact with the body. Other than that, regular 60/40 solder is much less expensive and is what typically is used in stained glass.
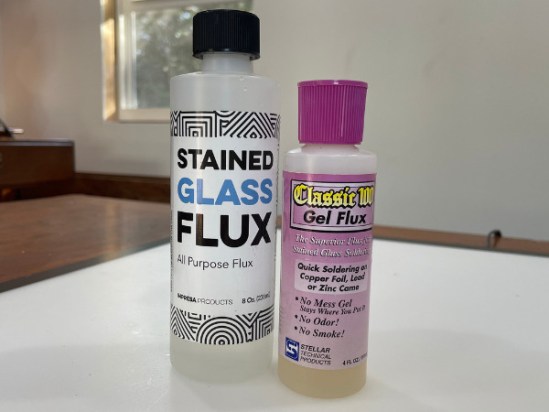
16. Flux
Flux is the chemical that removes oxide films from your copper tape or lead came, and increases the wetting ability of the solder. This causes our solder to flow over your metal surface without clotting. There are two types of flux: liquid flux, and gel flux.
I recommend trying both at some point in your stained glass journey so that you can decide for yourself which one you prefer. Every stained glass artist has their preference when it comes to flux!
17. Flux Brush
Most artists, me included, use these cheap little metal end brushes to apply the flux. However, I’ve also seen some artists use a typical paint brush and this seems to work just fine. I don’t know if there are any rules on the type of brush you use, I suspect not. So just use whatever works!
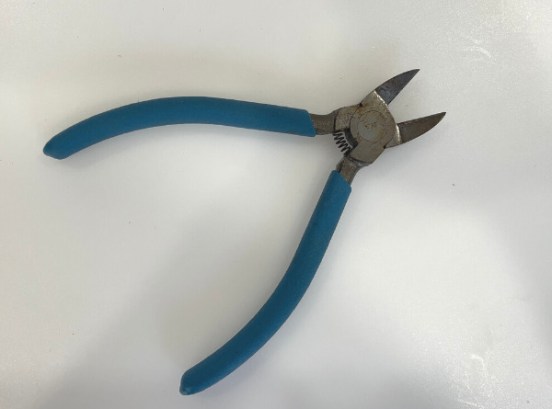
18. Lead nipper pliers (only when using lead came)
If you’re using lead came, either through your whole piece, or for the border. You will need to cut your came down to size. This is where you lead nippers come in. They’re really sharp and will create a clean cut in your lead.
19. Fid (only when using lead came)
As I previously mentioned, lead is a very soft metal. At times it’ll get twisted and bent, and especially when you cut it with your nipping pliers it can do this at the ends. A fid is a little plastic tool you can slide in the seam of your lead to open it back up so that it’ll fit over your glass.
If you do purchase one, I’d recommend the Studio Pro pack that comes with both the fid and the burnishing tool for smoothing out your copper foil edges.
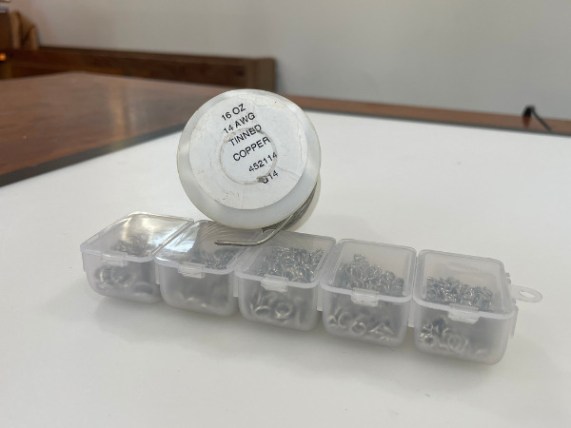
20. Jump Rings or Tinned Wire
I’m still trying to decide if I prefer jump rings or making my own little hooks with wire. As of now I go back and forth between the two. Jump rings are certainly easier because they are less work, but I personally prefer the look of the custom little hooks I make with the wire. I think because it doesn’t stick out as much as the jump rings do.
For my hooks I use 14 gauge tinned wire. It’s sturdy and comes out looking really nice. You’ll also need needle nose pliers to bend the wire into the shape you need, and your nipping pliers to cut it.
If you prefer to use jump rings (which are great when just starting out) you’ll need to pay close attention to the type of metal it is. Not all jump rings can be soldered. It’s usually a safe bet if the name or description mentions pre-tinned or silver plated jump rings.
21. Patina
Patina is the chemical that is used to change the color of your solder. You may have seen the three different solder colors: silver, black, or copper. Silver is just the color of the solder, so these pieces have not had any patina applied to them. However, copper patina and black patina are used to create these two colors. If you’re interested in owning both, you can also buy them in a pack.

22. Hanging Chain
There are a number of options for the hanging chain you use. In fact, it doesn’t even need to be a chain. Some people use various types of string and ribbon as well. I’ve always used the silver closed knit chain from Hobby Lobby on my smaller, dainty pieces, and the black powder-coated loop chain sold at Home Depot or Lowes.
Not-So-Necessary Extras
Layout Blocks
You don’t need layout blocks, but they’re nice for squared and circle shaped pieces.
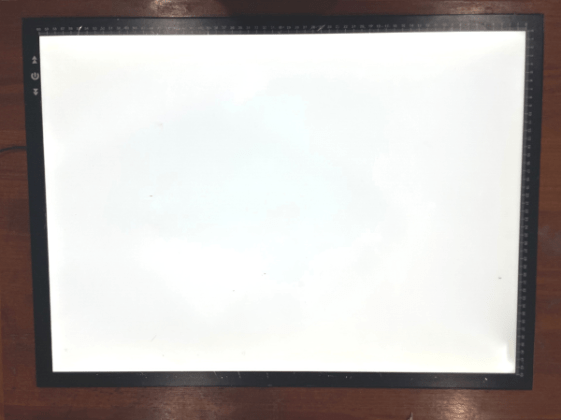
Light Tracing Box
I absolutely love mine and would never want to go without it… BUT.. you don’t HAVE to have it.
Extra Grinder Bits
I include these in this section because when you purchase your grinder it should already come with a standard ¾’ grinder bit. Unless you plan to start right away with difficult shapes, this bit is all you will need to start grinding down your glass.
Once you wear down your first bit, I recommend purchasing a bit set that includes different size options. You’ll notice in these there’s a ¼’ bit. This bit is great for getting hard to reach areas when you start cutting more complex shapes.
Be aware. Not all diamond grinder bits are created equal! The brand I’ve linked out to has done really well for me in terms of the smaller bit, but in the standard sizes I recommend the Twofers or this Inland grinder bit. It’s more expensive, but so far it lasts longer than any of the other bits I’ve tried.
Lead came vise (only when using lead)
Lead came is very soft and if it isn’t stretched before use, it will stretch over time causing your piece to warp. If you’re just working on smaller pieces, and don’t want to invest in a lead came vise right away you can simply use your running pliers and grozing pliers to hold the lead came while pulling opposite directions to stretch. I now have a vice and use if often, but for months I just had my husband help me stretch my larger pieces of came.
Area Protection Equipment
If you’re working in an outdoor area and on surfaces that don’t need protection, for instance a garage or a work table, then you may not need anything to protect your area. However, if you AREN’T working in an area like this, there are a few things that can help keep your space clean and protected:
- Soldering mat – This will protect your surface from the heat of your soldering iron and melted solder. As well as the flux and patina.
- Homasote board – This is what I always use. It’s create because you can use horseshoe nails or pins to hold your glass pieces in place before soldering, too!
- Waffle grid – A waffle grid is great for keeping tiny shards of glass off your work surface and floor. When I first started I always worked in our garage on a heavily used work surface, but I still used a waffle grid after stepping on shards of glass one too many times.

Polish
If you don’t care whether or not your solder is super shiny, than you don’t need polish. I personally go through phases with polish. I love the way it looks, but there are times I’ve skipped and loved my piece all the same.
The only polish I’ve had any experience with so far is the Clarity polish. This polish is made specifically for stained glass and works great. I also really like using this beezwas polish for a more subtle shine and maintenance cleans.
Tinned Decorative Wire
If you’re interested in using decorative wire on your piece, you’ll need some tinned wire, but this usually comes later – after you’ve mastered the basic steps.

And there you have it! I hope this list helps! I realize it’s still a very long list, because creating stained glass does involve using a lot of tools and materials. Hopefully with this though, you get a good sense of the bare minimum you need to get started. Welcome to this fun, beautiful, and technical art medium, and to your journey of becoming a glass creative <3


