
Wherever you are in your stained glass journey, at some point it’s good to know how to draw a stained glass pattern. It adds a whole new level of creativity and complexity to your craft, and is so rewarding getting to see your own ideas come to life in glass.
Making a stained glass pattern takes a lot of thought and intention. If you’re crafting smaller suncatcher or other simple pieces it’s a little easier, but when you get into the territory of designing large panels or drawing stained glass windows it can be very intimidating.
If you have mistakes when you draw your stained glass, that means trouble during the fabrication process. You can end up with a stained glass piece that failed to come out as you’d hoped, or even worse it could be a complete flop all together. This will cause you to waste time and materials – and piece of mind.
So let’s dig into how to make a stained glass pattern that will both work during fabrication, and hold up over time. Because I don’t know where you are in your skill level, I’m going to start with the basics.
*Heads up: TGC is reader-supported and this page may include affiliate links. If you click and purchase, I may receive a small commission at no extra cost to you. As an Amazon Affiliate I earn from qualifying purchases. You can read my full disclosure here.
Knowing Where to Place Break Lines
If you’ve already had your hands on stained glass, then you know the material can only break certain ways. Not only that, but that it WILL break in certain areas easier than in others.
When drawing a stained glass design it’s critical to place break lines where you will need them for your piece to have structural integrity. You don’t want a piece of glass snapping at the slightest movement or within a couple of years. Stained glass takes hours and crafted skill to fabricate, and when done correctly it can, and should, last for many, many years.
There’s two main things keep in mind when you draw a stained glass pattern:
- The shape of your pattern pieces
- Connections around your border to hold your lead came
If you are thinking about these two things while drawing your pattern and double checking to make sure you haven’t missed anything as you go, you can draw a stained glass pattern from or of pretty much anything!
Pattern Shapes
What tools are you using to fabricate your stained glass? If you have a ring saw you can make difficult shapes, however if you are using a glass cutter and grinder, you’ll need to make the shapes possible to work with these tools. This means no deep concaves where your grinder cannot fit.
Some questions to ask yourself while considering the shape of your pieces:
- Will my grinder fit to create this shape?
- Will this piece easily snap while I’m grinding?
- Is this piece large enough for me to work with, or is it too small? (this will depend on your experience and how small you WANT to go with any piece(s))
Lead Came Border
If you plan to border your piece with lead came (or hobby came), you’ll need to avoid creating large solid spaces on the outside. This will create gaps in your came that have nothing to solder to, therefore not giving it a good hold to your piece.
Drawing a Stained Glass Pattern From an Image
Using images to draw stained glass patterns is great for quickly creating patterns, but it’s also just a really great way to practice!
You can use an image you’ve taken yourself, or from any of the copyright-free stock image sites online. Some of good sites to use include:
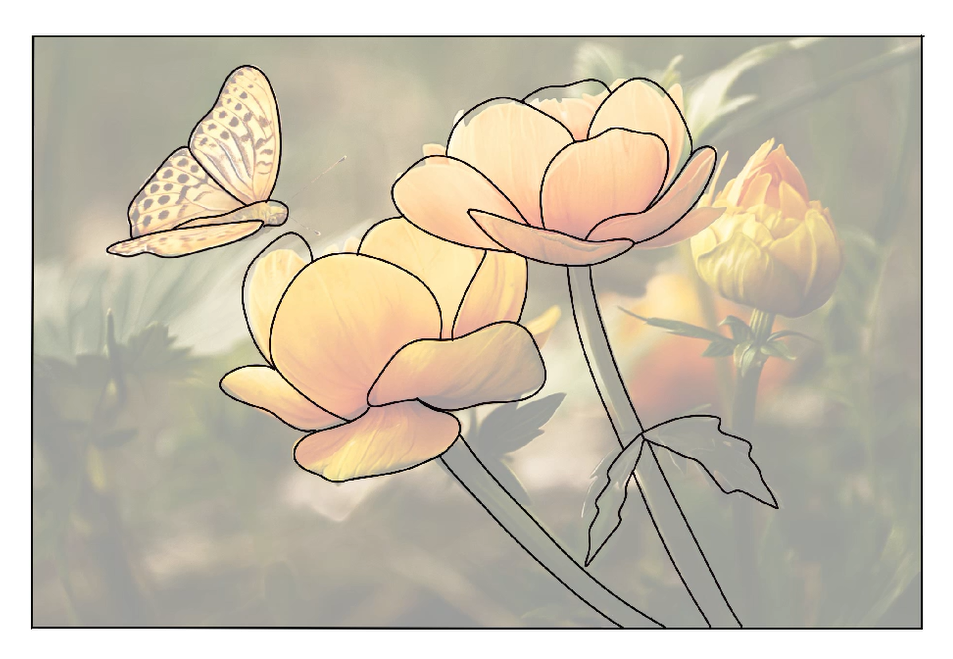
For this tutorial I’m using a beautiful garden image I found on Pixabay.

To create your pattern you have a couple different choices depending on what tools you have. You can:
- Use a tablet and a program similar to Procreate
- Simply print the image and use tracing paper, or regular paper if you’re using a light box
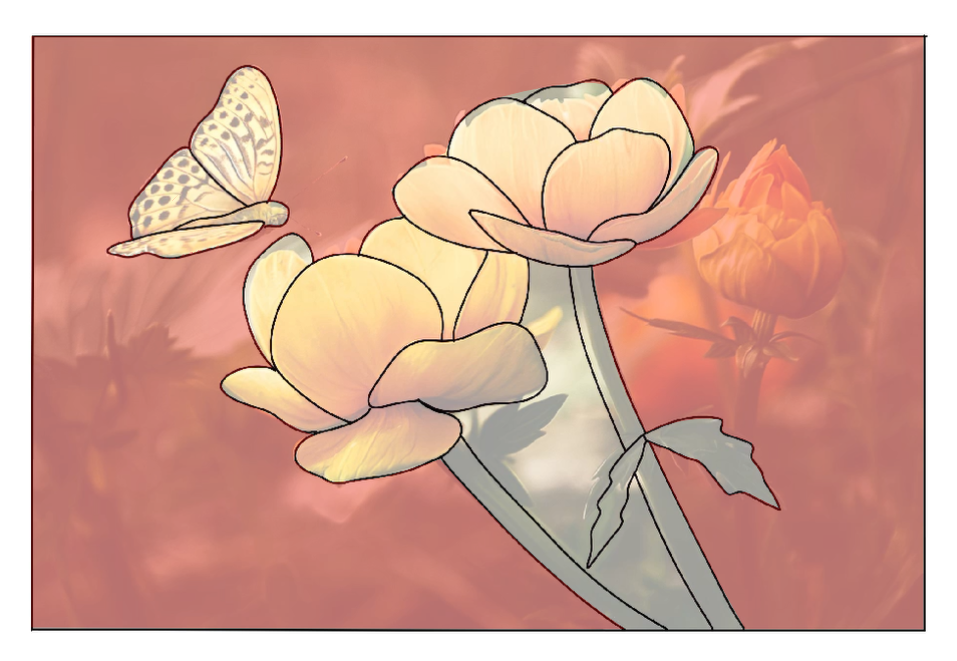
I have a tablet and Procreate, so I will save the image to my photos, and upload it into procreate.
For this I will first need to create a new canvas in the size I want. If I want to be able to print the pattern at home on my standard printer, I will create a 8.5” x 11” canvas.
Once my canvas is created, I’ll go to “add image” and insert the image I got from Pixabay. To start tracing I then:
- Size the image over my canvas how I want it to fit
- Turn down the opacity on my image so that I can still see the image, but also am better able to see any lines I draw over it
- Create a new layer to trace over the image
If you’re using paper and tracing paper, all you need to do is place your paper over your image and you’re ready to trace.
I’ve started to trace the main parts of the image, but notice I already have a small part between the butterfly and the flower that I would like to eliminate.
Every other part of the image, I can add onto to create workable shapes. However, the space between the flower and the butterfly creates a problem. My options here are:
- Simply draw a line from the flower to the butterfly, and from the butterfly to the pattern edge.
- Enlarge the butterfly so that it is touching both the top of the pattern edge, and the flower.
Since the butterfly is small, and I want larger pieces to work with – AND I need to somehow create two separate pieces on either side of it, I’m going to go with option 2.

To manipulate shape sizes in procreate:
- Open a new layer
- Draw your butterfly (or whatever it is you want to make larger/smaller)
- While on that layer, tap the selection icon
- Use the bordering dots to enlarge or shrink your drawing, and place it where you’d like it to go
Now that we’ve broken up that continuous piece into two separate pieces, we still have our border to think about.
For this piece I’ll be using a lead came (or hobby came) border, so I need to create connections all along the outside so my came has something to solder to.
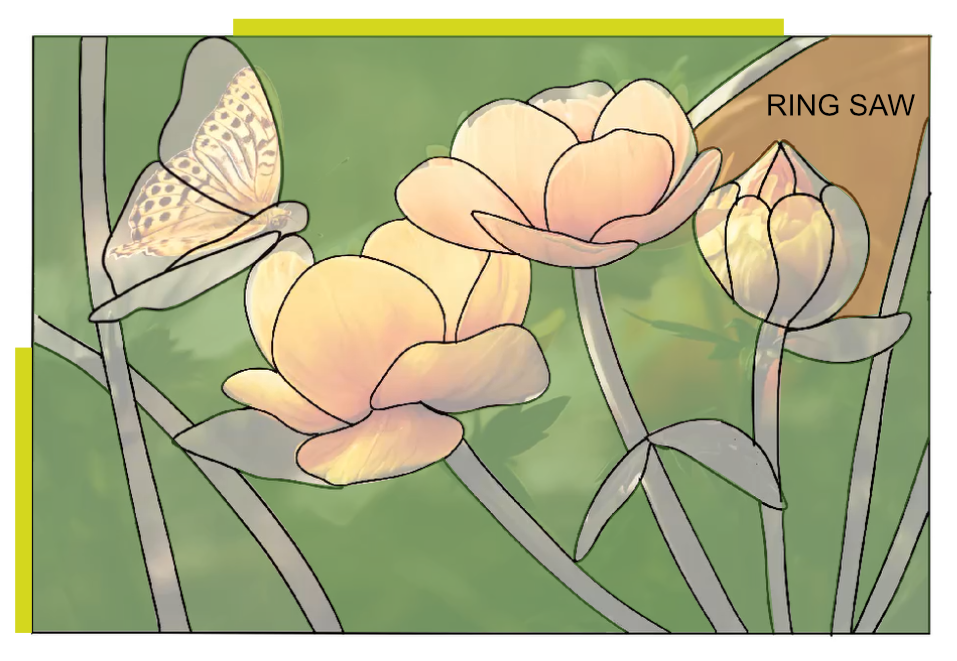
I’ve added stems throughout my piece that connect to the pattern border for my lead came, however I still have two pieces along the border where I want some more connection points (in yellow.)
I also have a piece that after looking at it, I realize is a difficult piece. However, I have a ring saw and want to keep this piece as-is. If I did not have a ring saw, I would need to move the top stem so that it was touching the top of the small bud flower to create a break line there since the grinder will not fit in that small of a space.
Changes I’ve made:
- Added stems so that I had break lines extending to my pattern border for my lead came, AND broke up the glass pieces to manageable shapes.
- Added leaves where I needed more break lines.
- Simplified the shape of my leaves to a round shape so they would be easier to create in glass.
To take care of the two border spaces above where I wanted more connections lines, I:
- Added a flower pedal at the top
- Added a leave on the left bottom side
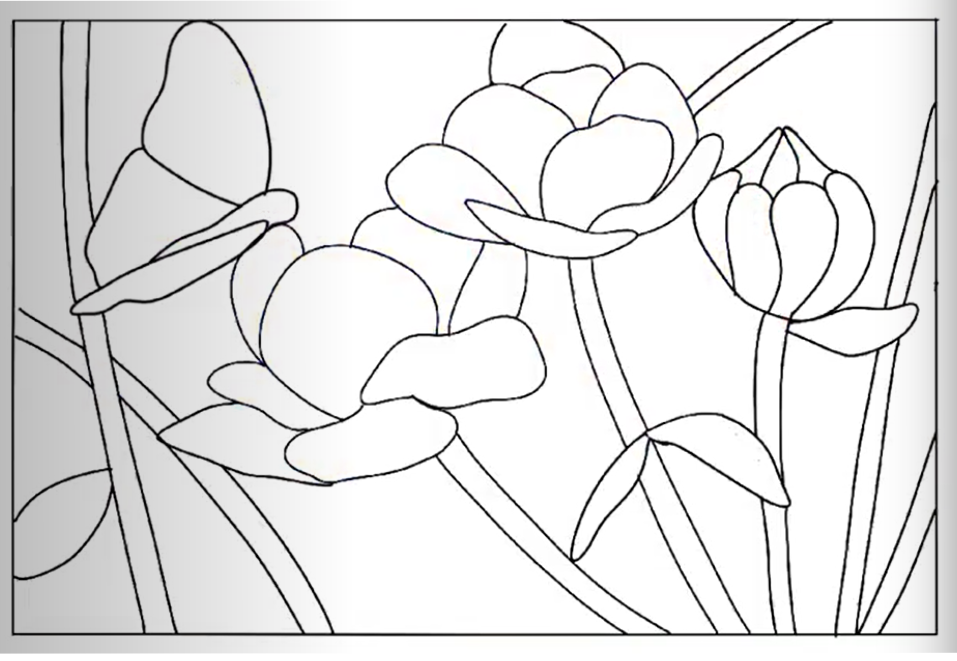
Now, I have a pattern that I can use to create a stained glass piece.
Keep in mind that stained glass is like any other art, and over time you will develop your own style. Even if you are using images to help you create patterns. The way you manipulate, and change the images will lead to your own style.
In this demonstration I manipulated the image to avoid adding noticeable break-lines. This is just how I do it. You can also simply add lines if you like, and that comes out looking just as good!
Something else I might do to this pattern to make it more “sturdy” is add additional break lines breaking my stems up into smaller rectangular pieces. This is because some of these stems are long and skinny, and may easily snap on me while I’m grinding.
I hope this helps you on your journey to creating one-of-kind stained glass patterns for yourself.
Feel free to leave a comment if I’ve missed anything, or if you found this useful <3
Now go get creative with some glass 🙂


Pingback: Supplies You Need to Create Stained Glass - The Glass Creative