
If you’ve been around stained glass for any amount of time, you’ve likely heard the term “Tiffany method” or stained glass copper foiling. This is the method of joining stained glass together with a thin copper foil tape v.s. using lead came.
Louis Comfort Tiffany blazed a trail using this method to create his iconic Tiffany Lamps in the 1800’s, and artists and hobbyists alike still flock to this method because of the intricate designs it allows you to create.
I personally use copper foil in all of my pieces, and apply lead to my borders for stability (when appropriate.)
If you’re just starting out and you’ve yet to use either copper tape or lead came, copper foil is a great option for beginners. It’s more affordable to start and best for smaller hobby projects.
So let’s dive into how to choose and use copper foil tape for your stained glass projects.
*Heads up: TGC is reader-supported and this page may include affiliate links. If you click and purchase, I may receive a small commission at no extra cost to you. As an Amazon Affiliate I earn from qualifying purchases. You can read my full disclosure here. Thank you for your support <3
What Copper Foil to Use
How to Choose Size
Probably the most confusing part about just starting with copper foil is all the options you have to choose from. The biggest one being size.
Copper foil tape ranges in size from 5/32 to ⅜. These sizes are referring to the width of the copper tape, therefore indicating how much tape will show on either side. This will determine the overall size of your solder lines.

I’ve created this comprehensive copper foil size guide to show the different sizes and how much each one will overlap on your standard 3mm sheet glass. This way you can keep it handy in your studio or work space until you have them down by memory.
So can you use different sizes of copper foil for different parts of your project? Certainly.
My personal preference is to use a mix of 7/32 and 3/16. I use 7/32 on the larger pieces of glass and the 3/16 tape on the really small pieces of glass.This is because 3/16 is a smaller tape and therefore covers up less of the glass when it’s folded over. If you have a really small piece of glass in your project, and you use a larger tape to foil it this can completely cover your piece.
When just starting out 7/32 and ¼” are great options. This is because a larger copper foil tape will allow for easier soldering and great practice for building up a proper solder bead.
**Note: While you experiment with tape sizes, you may find that anything smaller than 7/32 is more difficult to build a consistent, even solder bead. At least this is my experience. This is why I use a mix of size instead of using 3/16 throughout my entire piece. However, it’s all personal preference.
How to Choose Backing Color
This part is simple. What color do you want your solder to be?
If you’re using any level of transparent glass the backing color of your tape is going to show through your finished project. That’s why it’s a good idea to choose a backing color that matches the color of your solder lines.
There are only three options here:
- Silver
- Black
- Copper
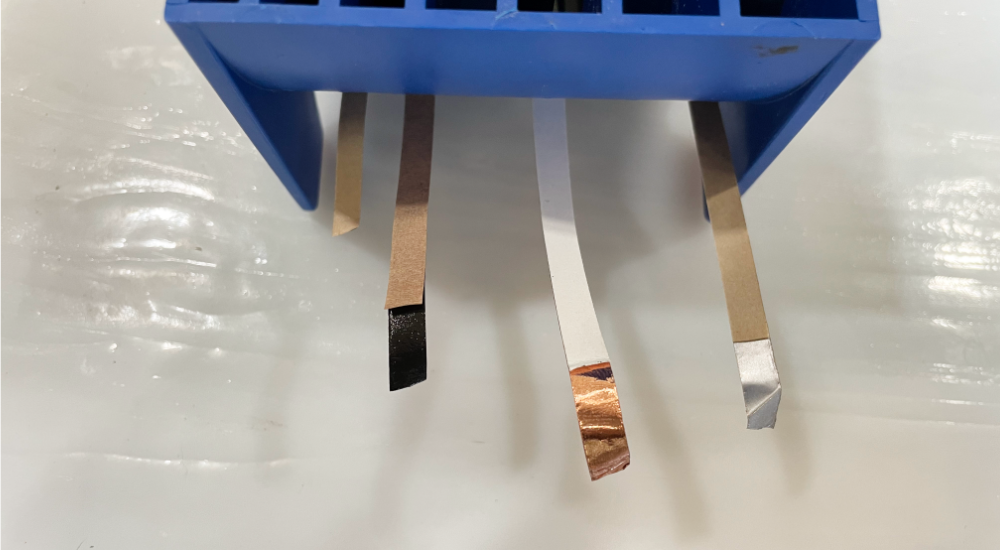
I’ve had people ask me in the past which of these three tapes adhered to the glass better. They all adhere the same in my opinion. The difference in your adhesive is going to come down to the brand of tape.
Top Copper Foil Brands
There are three main brands you’ll find when shopping for copper foil tape for stained glass. From $$$ to $ they are:
- Venture – I’ve only used this tape a handful of times. This is the most expensive tape, but it works very well.
- Edco – My favorite brand. This tape is more expensive than Studio Pro but the adhesive is far better in my opinion.
- Studio Pro – A decent tape if you’re on a budget, but the adhesive isn’t as strong and melts out faster from under the tape if you’re not careful while soldering.
Applying Copper Foil to Glass
Your copper foil tape serves as the foundation for solder. This is how you connect your different glass pieces together, therefore in order to have even solder lines, you’ll want to have even copper foiling.
To apply copper foil to your glass, follow these steps:
- Check and make sure all edges of your glass piece is clean of all glass dust and debris.
- Line up your tape so it’s centered on your glass edge and stick it firmly to the edge to get it started.
- With the tape held in the center of the glass edge, apply all along all edges of your piece of glass.
- Using your fingers, fold over the edges onto the sides of your piece of glass.
- Varnish all edges using your varnishing tool.
- Trim any overlaps or flaws with an X-Acto Knife
Keep in mind that everyone applies copper tape differently. Pay attention to what feels most comfortable first to find the method that’s right for you, then focus on perfecting your skill. If you find copper foiling is difficult for you, there are tools to help make it easier. I’ve never used one of these, but I found this affordable option for a foiling tool.
Recommended Tools
Even if you go the route of foiling by hand, there are still some things you’ll need:
Scissors
These are pretty obvious. You’ll need to have a pair handy to cut your foil to length.
Varnishing Tool
I now use an actual varnishing tool because I snagged one for free along with a bunch of other supplies from an artist that was retiring his craft. However, months before that I used a sharpie marker. You really just need something to flatten down your tape. You don’t have to get fancy here.
If you are interested in purchasing a varnishing tool, I would recommend getting a FID set, because down the line you will need a fid when you’re ready to start incorporating lead came.
X-Acto Knife
Trimming up your tape in overlapping areas will make a huge difference in your finished product. X-Acto knives are also great for trimming up patch work around deep curves (I’ll get to that below.) Bottom line, to get great copper foil lines, you’ll definitely need an X-Acto knife or something similar.
Foil Dispenser
This is not a tool, nor is it necessary. However, a dispenser (the one shown in the photo above) does make the foiling process much easier and is a great way to store and organize your foil tape.
Foiling Tips
Mastering copper foiling does take some time and practice, but for the most part it’s pretty simple. However, there are a few things I’ve learned along the way that make a huge difference in your finished product. So here’s my top three tips for foiling:
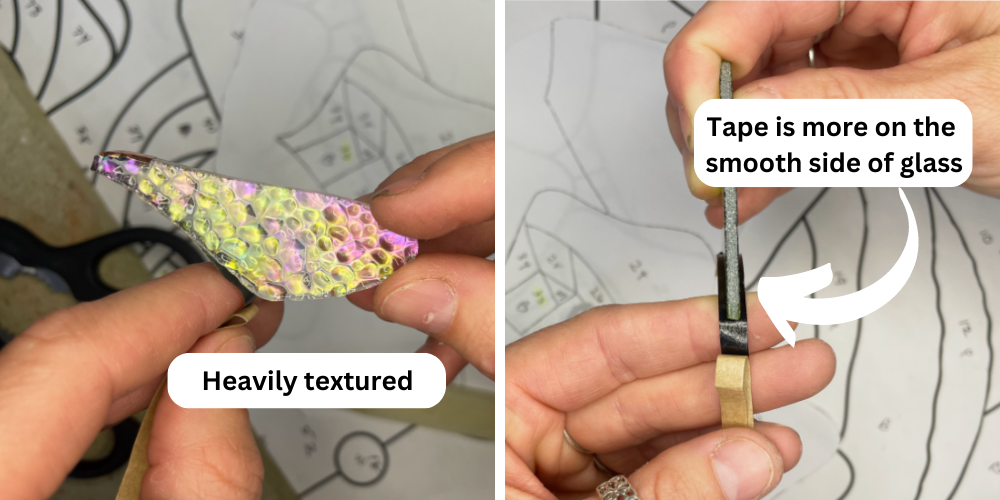
Foiling textured glass
When applying copper foil to heavily textured, transparent glass, you can line up the tape so that more of it is applied to the smooth side of glass vs the textured side. This will help you to have a smooth solder line when your project is held up to the light.
Copper foil tape not sticking to glass
This can happen for various different reasons. However I’ve noticed that when it is happening, most of the time the edge of your glass will be a different color. If you look at the spot where the tape won’t stick and it appears darker in color, almost like it’s wet – the easiest fix for this that I’ve found is to lightly pass that piece of the glass on the grinder wheel.
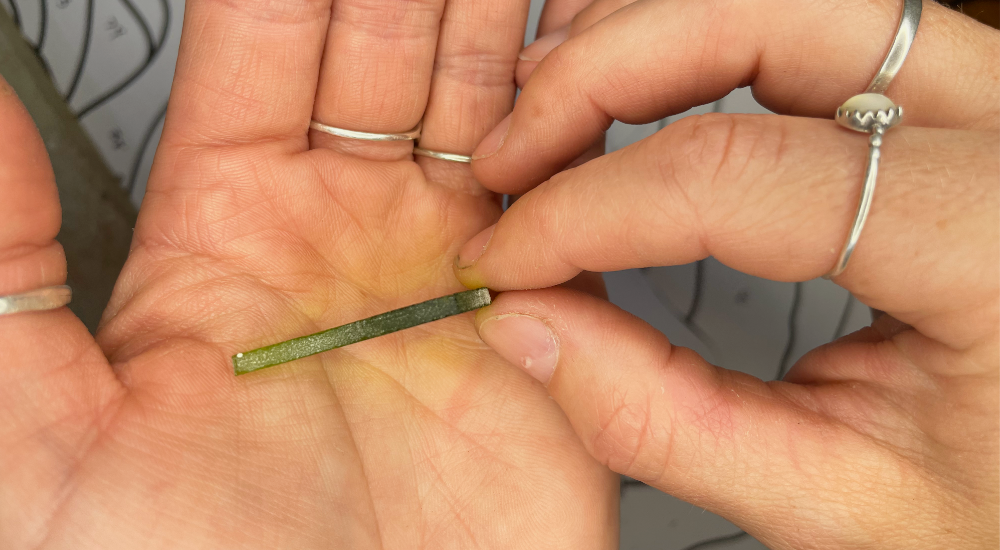
You can also apply alcohol to the edges to clean them really well and dry it out, but this takes longer. Passing it lightly across your grinder wheel and wiping it dry with a clean rag or paper towel is much faster.
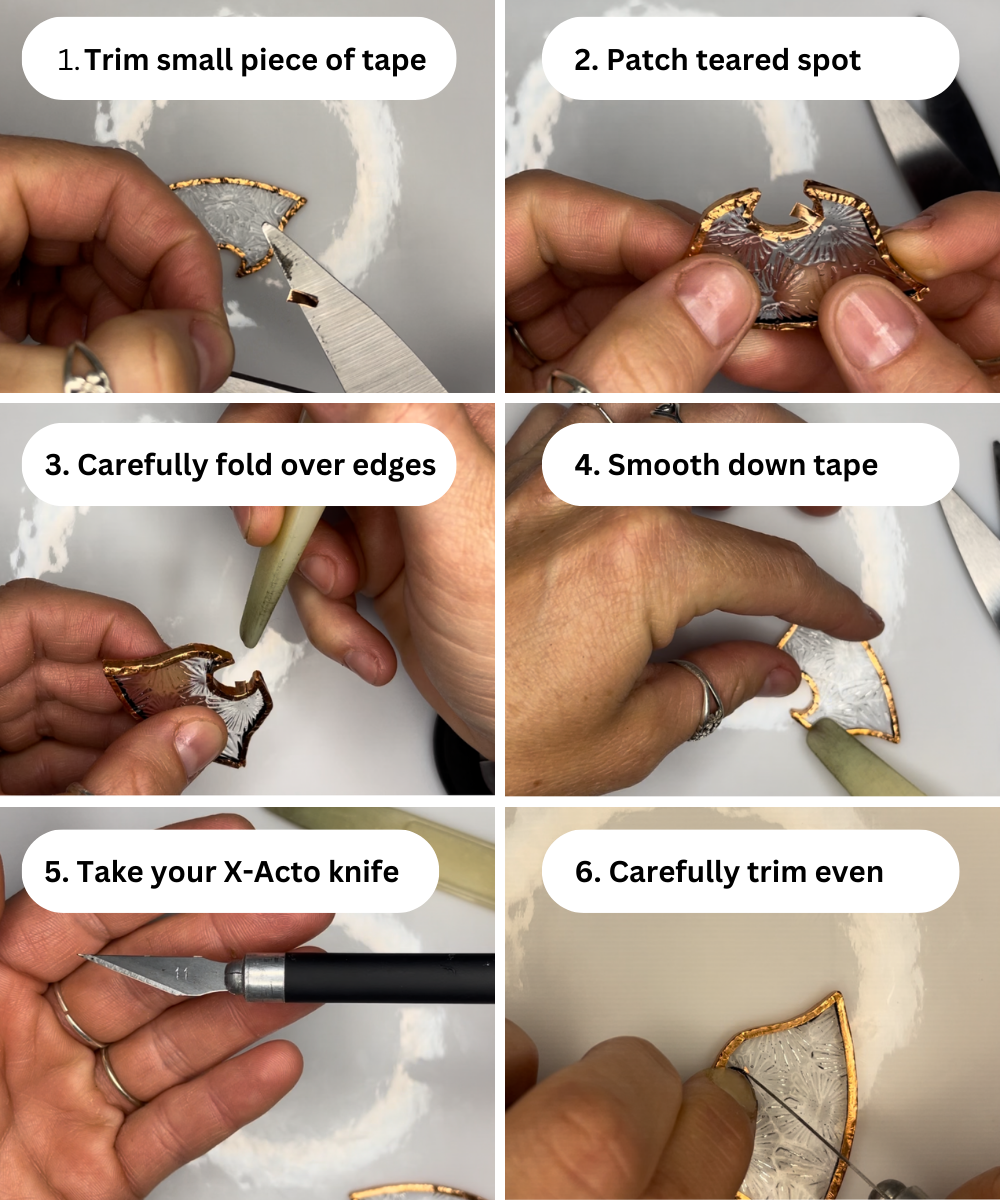
Patching Tears in Your Tape
If you get a tear in your copper foil, especially while folding it over your edges in deep curves, you don’t need to start over.
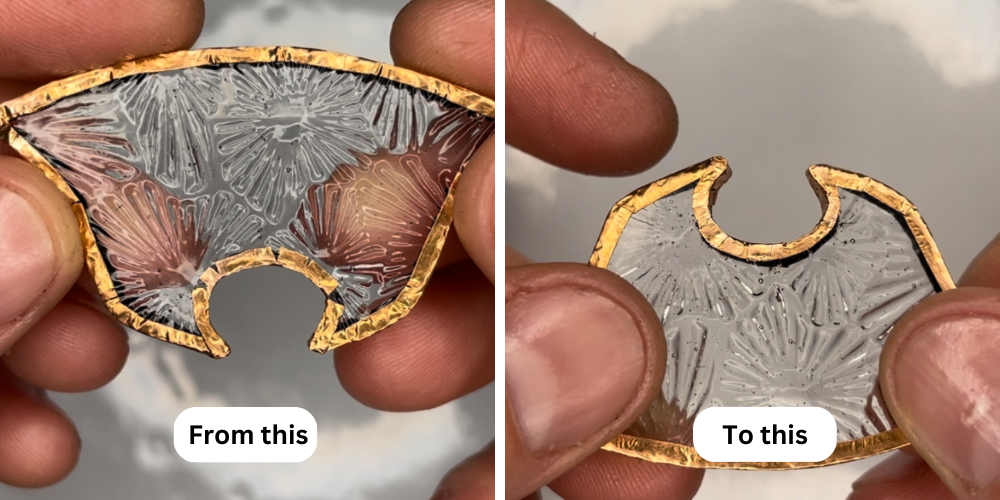
Continue with laying all your tape over your edges and varnishing it flat. Once you’ve done that, cut little pieces of copper foil tape to patch those areas that are torn. Varnish your patches down flat over the other tape, and use your X-Acto Knife to trim it so that it appears to be a perfectly straight copper foil line.
This takes a lot of time and patience, but if you can master this you’ll be able to create pieces with very complex cuts. If you want 🙂


Pingback: DIY: Stained Glass Candle Holder
Pingback: How to Make Stained Glass Step-by-Step - The Glass Creative
Pingback: Supplies You Need to Create Stained Glass - The Glass Creative