
The Tiffany Method, or copper foil method, is a wonderful way of creating intricate and versatile stained glass works of art and projects. Compared to leaded glass, however, copper foil does fall short on strength.
*Heads up: This page may include affiliate links. If you click and purchase, I may receive a small commission at no extra cost to you. As an Amazon Affiliate I earn from qualifying purchases. You can read my full disclosure here. Thank you for your support <3
When you’re creating larger pieces, or just want more strength through any piece, it’s a good idea to add a lead came border for more support. Lead came borders also give your piece a more professional and finished look. Even if you’re the master at beading your edges, there’s just something about finishing off a piece with some smooth, sturdy came.
For the edges of your glass you’ll need to use U lead came. This comes in a number of different sizes for different size projects. Thick sturdy came for larger more heavy panels, and thin flexible came for smaller projects like this DIY Candle Holder.
Since discovering the small lead came (because I hadn’t for a while) I now border ALL my pieces with came. Even my night lights.
You also have a couple choices for the shape of your lead came.
Type and Size of Lead Came to Use
Stained glass lead came comes in two types: H lead came, and U lead came. H came is used interior pieces and U came is used around the border of your stained glass projects.

Came also comes as rounded or flat. However, if your project is smaller you don’t need to worry about this because you’ll most likely be using a 5/64” came and this only comes in round.
If your piece is larger, or you just want a real sturdy border, you have more options on your came shape. These are the lead cames I use and the type of projects I use them for:
- 5/64” Round U Came for small projects like candle holders and night lights
- ⅛” Flat U Came for larger square-shaped panels
- 3/16” Round U Came for large circle-shaped suncatchers and panels
Preparations for Applying a Lead Came Border
Before we get into how to apply the border to your stained glass piece, you should know that you may have an easier time with the process if you skip copper foiling the edges of glass that make up the outermost edge of your piece.
This isn’t as true with larger lead came since they’ll cover a lot of the copper foil, but if you’re planning to border your project with 5/64” lead came (or hobby came,) then you will want to leave the bordering edge unfoiled.
If you don’t do this, or if you’ve already copper foiled and soldered all your glass together, no worries! You can simply cut away the peaking copper foil tape with your X-Acto knife, it’s just less of a hassle if you don’t have to.
Another thing you’ll want to do is stop your solder application far enough from all glass edges so that the lead came will fit over the glass. If you bring a solder line out too far, this will cause the came to not fit properly, or not be able to slide over the edge at all.
So to recap, for preparation we need to:
- Avoid copper foiling the very edges of your glass that will have lead came border (unless you’re using came larger than 5/64” and are okay with trimming off peak-a-boo pieces of tape)
- Avoid bringing your solder lines all the way out to the edges of your glass

Supplies You’ll Need
Apart from your other stained glass supplies for the copper foil method, you’ll need:
- Lead came of choice
- Fid
- Rubber mallet
- Nipping pliers
- Vice (or a helpful hand)
Before you apply any lead came you should stretch it to get all the kinks out. This also will keep the came from stretching on its own over time.
If you don’t have a vice, you can hold one end of your came with needle nose pliers, and have someone else hold the other end to help you firmly pull and stretch. This is how I stretched my came for many months before finally installing a vice in my studio.
How to Apply Lead Came Border
Now – you have your copper foiled piece. It’s all soldered together (excluding the edges) and you’re ready to attach your came border.
Step 1: Cut Came to Roughly The Size You Need
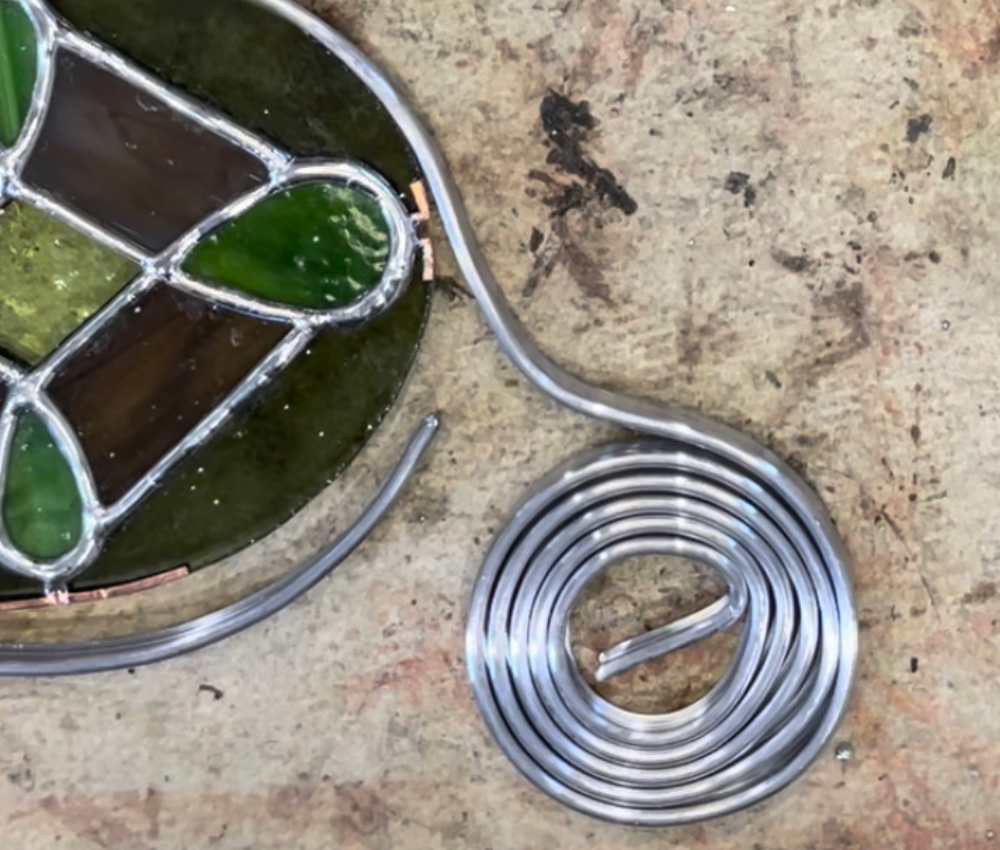
Take your came and lay it loosely around your piece to get a rough measurement. You’ll be stretching it so doing this will give you more than you need, but it’s better to have more because your ends will get crimped from your pliers or vice.
Step 2: Stretch The Came
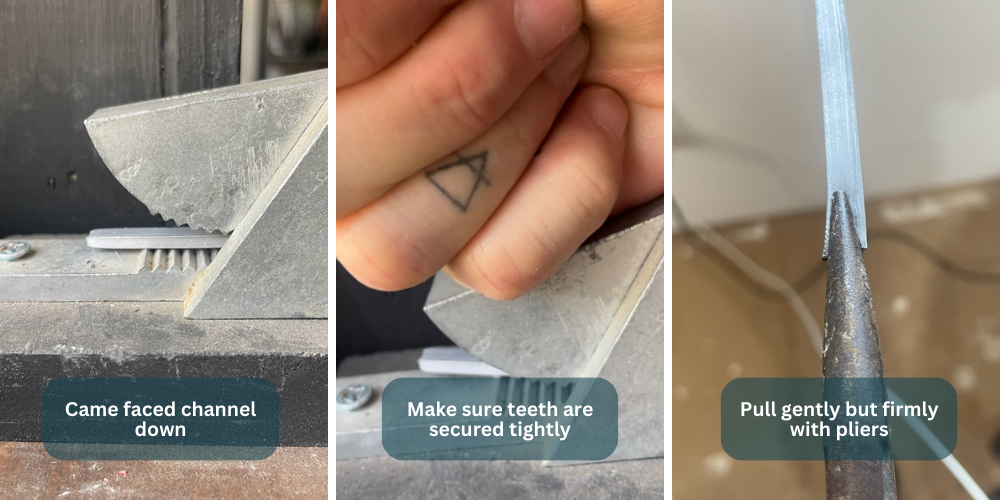
If you have a vice it’s much easier to stretch your came. You will do this by following the steps in the image above.
If you do not have a vice to stretch your came, you can also employ the help of someone else to hold the other end of your came with another pair of pliers and pull. I did this for many months before I installed my vice.
Step 3: Trim Crimped Edges

After you’ve stretched your came you’ll have “crimped” ends from the vice and/or pliers. Before you start to work the lead came onto your piece you’ll want to trim this off with your lead nipper pliers.
Step 4: Attach At a Jump Ring Joint

To begin your lead border you’ll want to attach it with solder to a (or the if there’s only one) joint where you’ll have a jump ring.
You don’t want to flood it with solder here because the other end of your came will still need to meet this edge.
Note: If your piece is much smaller, and of a simple shape, you can skip this step and go straight to pulling, and trimming your came to size and soldering the seam before attaching all solder joints.
Step 5: Pull Came Tight and Trim to Fit
Before you begin to solder the rest of your lead, you’ll want to trim it to size so you don’t have all extra came to contend with. The longer the lead the more chances of it getting twisted and crimped.
If you get to a place in your piece that the lead can’t go around, like an angled edge, simply cut your lead came so that it fits to the end of the edge, and start again with the rest of your came. With round pieces you are able to use one continuous piece of lead, but pretty much any other shape will require you to cut your came into separate pieces.
Step 6: Solder All Joints to Lead Came Border
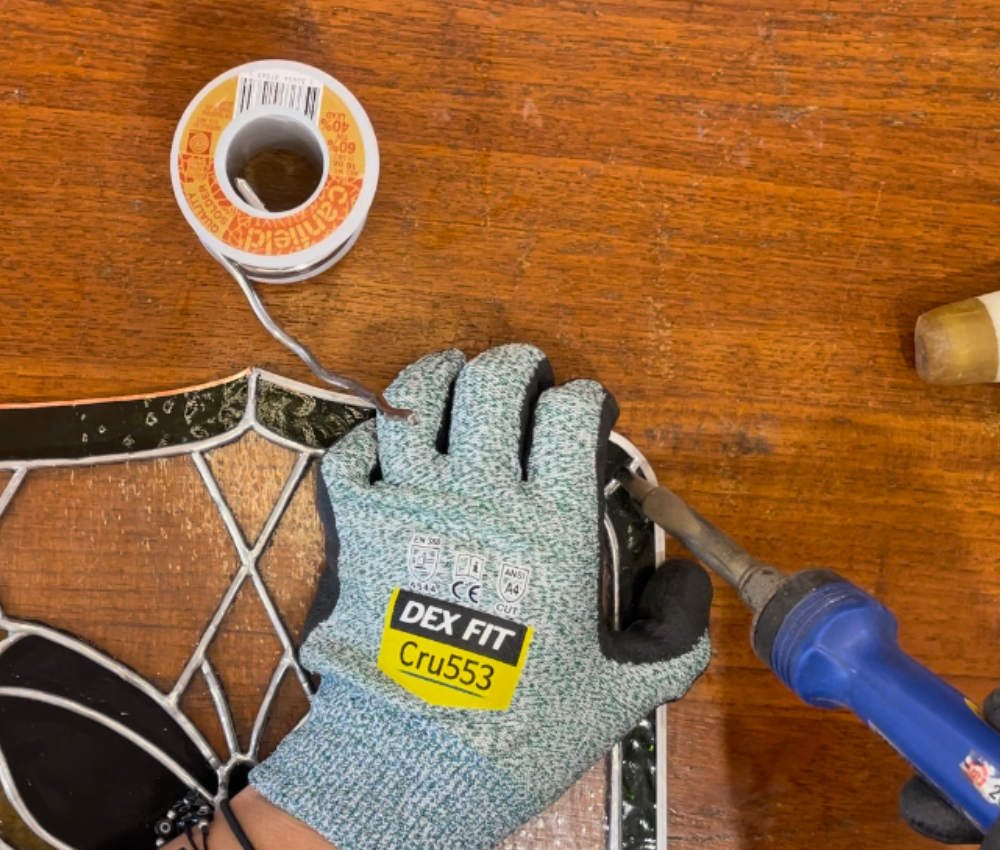
Now that your lead is secured to your piece at the joint where it will hang from, and it’s trimmed to the size you’ll need. It’s time to start going around and soldering all joints to your lead border.
Step 7: Solder Your Lead Came Seam
Once you’ve gone around every joint on the front of your piece, you can go lead and solder the seam where the two lead ends meet.
Step 8: Repeat Step 6 on Backside
Once you’ve gone all the way around in the front and have your lead seam soldered, it’s time to solder all your joints on the backside.
Step 9: Attach Jump Ring(s)

Time to solder your jump rings to your lead. I believe I’ve said it already above, but keep in mind that even with a lead border, you still want to place your jump ring where there’s a solder joint.
Attaching a jump ring to lead isn’t much different than attaching it to a beaded border, however lead does melt at a lower temperature than solder so you’ll want to be careful how long you hold your iron on the lead.
I know that’s a lot, so here’s a full tutorial in video form:
And that’s how you add a lead came border to your copper foiled stained glass! I hope this tutorial was helpful as you progress in your glassing journey.
Happy creating <3


Pingback: DIY: Pressed Flowers in Stained Glass
This design is spectacular! You definitely know how to keep a reader entertained. Between your wit and your videos, I was almost moved to start my own blog (well, almost…HaHa!) Fantastic job. I really loved what you had to say, and more than that, how you presented it. Too cool!
Oh my gosh thank you so much! I’ve actually had to take a break for a little while bc it’s a lot of work!!! lol – I love doing it though, and this was exactly the motivation I needed going into the new year. Thank you again! <3
Pingback: How to Make Stained Glass Step-by-Step - The Glass Creative
Kassie, your tutorial is so well done, thank you. I love the option to print for reference, but also have the video to view as well. I’m new to stained glass and it’s so infectious. I keep coming up with new ideas and even love making my own patterns. But I had a hybrid situation where I wanted the copper foil inside, but I wanted the strength and good looks of the lead outside. I’m so glad I googled my desire and came up with your video. Keep it up! We all thank you. Jim
It makes me so happy to know that my tutorial was helpful 🙂 thank you so much for taking the time to comment <3