
The very first time you go to cut glass for stained glass it can feel very intimidating. Just like with anything else though, the more you do it the easier it gets. A lot of scoring glass, because that’s actually what you are doing instead of cutting, is a “feel” thing. It comes more natural the more you do it.
However, there are some very basic do’s, don’ts, and tips to help get you started.
*Heads up: This page may include affiliate links. If you click and purchase, I may receive a small commission at no extra cost to you. As an Amazon Affiliate I earn from qualifying purchases. You can read my full disclosure here. Thank you for your support <3
Prepare Your Tools and Protect Yourself
Before you begin scoring and breaking any glass you’ll want to make sure you have all of the tools and protection equipment you’ll need handy. As well as make sure your tools, or more specifically your glass cutter, is in proper working order since this can have a major impact on our score lines.
Prepare Your Tools
To begin cutting you’ll want to have these tools laid out and ready to go:
And depending on your work area and surface, you may want to have something like a waffle grid to capture any small shards of glass.
Depending on what glass cutter you’re using, you may or may not need to oil your cutting wheel. Most glass cutters sold these days will have a hollow compartment where the cutting oil can be added to lube up your wheel as you cut many different pieces of glass.
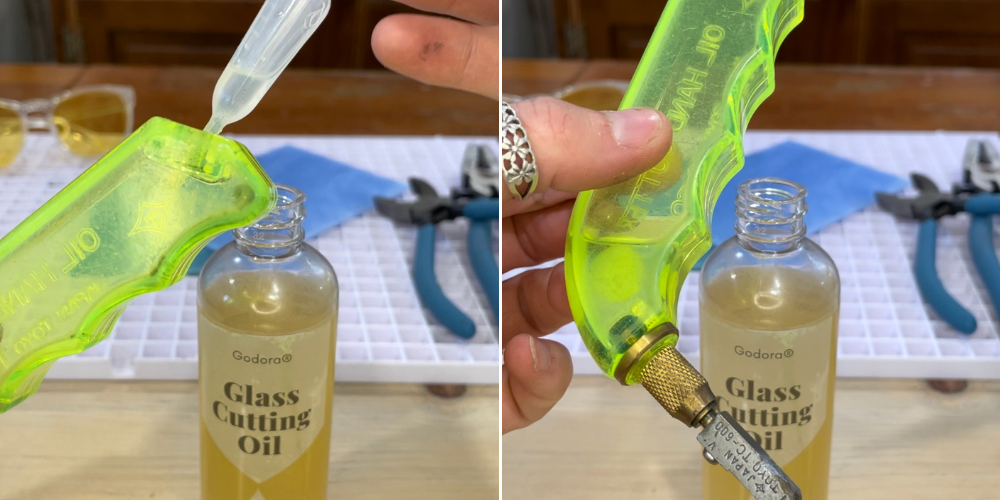
If your glass cutter does not have this, you will need to apply the oil directly to your cutting wheel so that it is able to slide smoothing across the surface of the glass.
Glass cutting oil is very important, as is the mobility of your cutting wheel. Even if you are using a glass cutter that holds the oil, it’s a good idea to check that your cutting wheel is able to move freely before scoring any glass. If your cutting wheel is getting stuck at all, this can cause you to gouge instead of score the glass resulting in the glass breaking incorrectly or not at all.
Protect Yourself
I know wearing protection equipment isn’t the coolest, or always the most comfortable thing, but coming from someone who has cut a lot of glass – it’s well worth it.
You don’t need a lot, just a nice pair of safety goggles and a good pair of cut-proof gloves.
While you’re breaking your glass it’s very possible that small shards can shoot up towards your face. I’ve said it once on this blog before, but I can’t stress it enough – you need to protect your eyes! I’ve had a scratch on my eyeball from a small shard of glass and it was AWFUL.
Common Glass Cutting Tips
Before you begin to cut anything, there are a few things to keep in mind while scoring your glass. These are common best practices that you should try to practice when cutting any piece of glass:
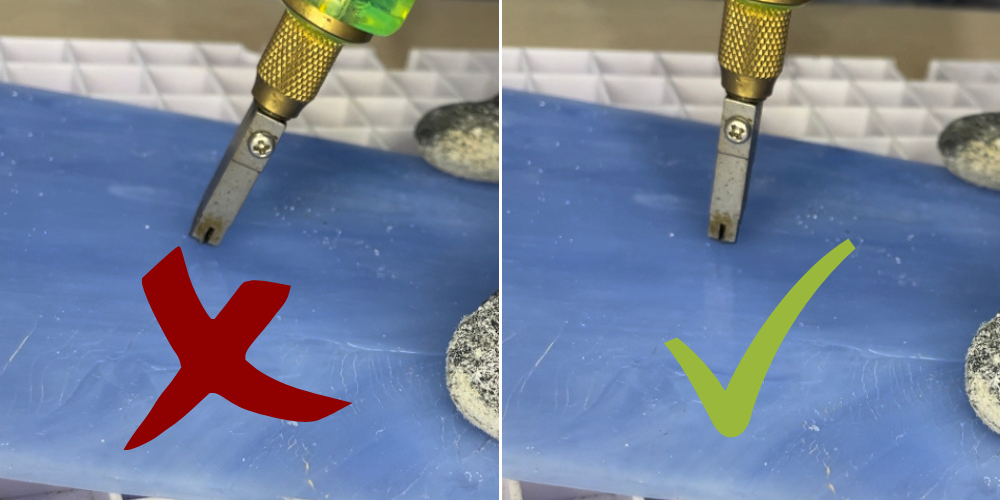
- Keep your cutting wheel straight and don’t tilt it to either side
- Keep the consistency of your pressure the same through the score line
- Do not score twice over the same line. This can mess up your cutting wheel and will cause a bad break. If you need to re-cut, cut inside your old score line.

- Always cut the smooth side of the glass. Not all glass has a perfectly “smooth” side, but if your glass has one side that is more smooth than the other, cut the smooth side.

- Always score from one edge of the glass to the other.

Find The Right Amount of Pressure for Your Score Lines
If you ever hear people suggesting an overall amount of pressure to apply to glass for the “perfect” score line, this is more of a generalized rule of thumb. Truth is not every piece of glass is the same and will require the same amount of pressure.
Not all pieces of glass will make a pleasant “zipping” noise either.
Most of the smooth 2mm and 3mm stained glass sheets will require about the same amount of pressure, but when you get into some of the more textured glass or mixed colored glass like those of the Youghiogheny and Kokomo line, the pressure you need can vary.
Your best bet when cutting a piece of glass for the first time is to test a corner or edge of the glass first to see how much pressure works best. This way you minimize your chances of mis-breaks when you go to cut your actual pattern pieces out.
Some things to look for on your test piece:
These are things you will see when the appropriate amount of pressure is applied while scoring your glass. If these things don’t happen it could be you are pressing too hard (most often the case), aren’t pressing hard enough, or your cutting wheel isn’t moving freely.
- Your score line should be almost invisible
- The glass should only break along the score line
- The glass should break cleanly and evenly

Make Sure Your Cuts are Possible
Before you begin cutting out any pattern pieces from your glass, make sure they are aligned on the glass in such a way that can actually be cut. If you’re not sure how to transfer your pattern pieces to your glass, or your current way isn’t working out great, you can see all the ways to transfer your patterns here.
Keep in mind with every score you will need to go from edge to edge.
If you have a pattern piece laid down where it will block your score line for another piece, you will end up having to re-trace or re-glue that pattern piece because the glass will break through the middle of it.
You can cut slight curves, but never sharp angles or corners.
Keep in mind to visualize your score lines while you are laying down your pattern pieces onto your glass to avoid cutting through one of your traced or glued down pattern pieces.
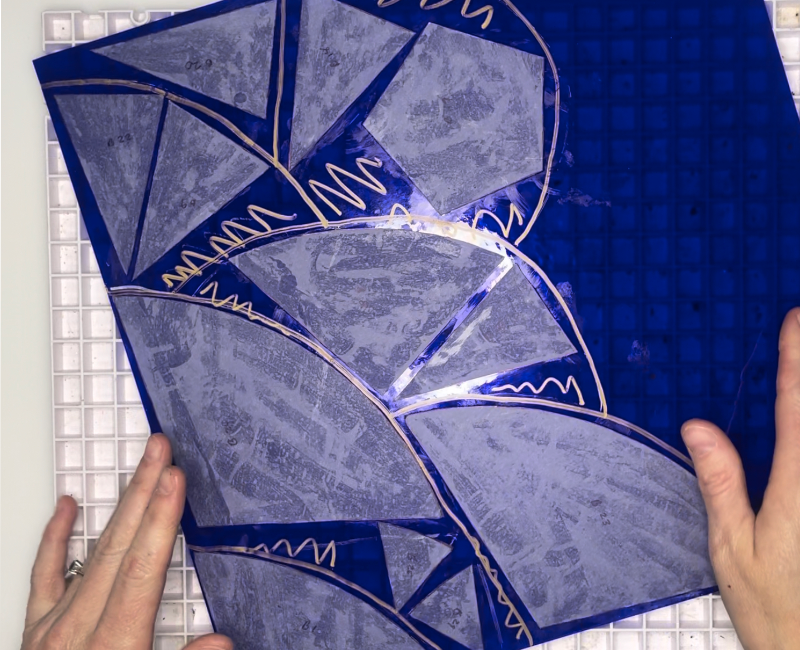
Be sure to keep cutting edge to edge until you have all your pattern pieces separated and can refine your shapes.
To cut out circles you simply continue cutting curves around your circle. Make sure your curves aren’t too deep, or else the glass may break where you don’t intend it to.
Here’s a short video demonstrating how to cut a circle out of glass:
Cut Out Your Pattern Pieces
Now that you know the basics and you have your pattern transferred to the glass you can begin cutting out your pieces.
To cut out all your pieces you will:
- Score from edge to edge
- Line up your running pliers so that the middle mark is even with the score line, and carefully but firmly press down on your running pliers to break the glass along your score line
REPEAT until all your pieces are separated from each other.
Once you have all your pieces separated, refine your shapes as best you can using the same first two steps. Cutting from edge to edge and using your running pliers.
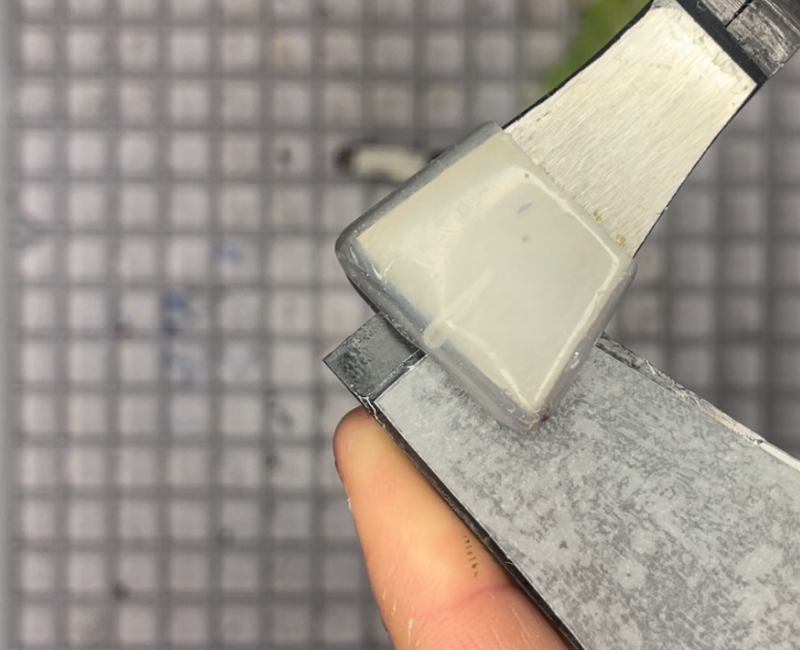
To trim off smaller pieces of glass that you can’t get with your running pliers:
- Take your grozing pliers (flat side up)
- Line up your pliers with your score line and pull straight out

Your grozing pliers can also be used to “groze” away small shards of glass to refine your shapes even more. To do this you simply clamp down on the glass shards with your grozing pliers. I show this at the end of the video of me cutting a circle above.
And that’s the basics of cutting glass for stained glass. I hope this article was helpful. Let me know in the comments below.
Happy creating! <3


